Chooch Computer Vision API Guide
Guide to calling the Chooch computer vision API
Accelerate your computer vision deployments by taking advantage of the Chooch computer vision API. This documentation provides insight into how to call the API, how to provide an image for analysis, and examples of the what to expect the returned predictions to look like.
You can retrieve your API key by logging in to your AI Vision Studio account.
Chooch API v2
Object Detection API
URL Post

- Python
- Javascript (REST)
- cURL


														import requests
import base64
import io
from PIL import Image
import json

image = Image.open("your_local_image").convert("RGB")
# Convert to a JPEG Buffer
buffered = io.BytesIO()
image.save(buffered, quality=90, format="JPEG")
# Base 64 Encode
base64_string = base64.b64encode(buffered.getvalue())
base64_string = base64_string.decode("ascii")

payload = { "base64str": base64_string, "model_id": '027765184-5b08-410c-97c7-c2caf3p01ad', "conf_thresh": 0.4, "nms_thresh": 0.45 }
api_url = 'https://apiv2.chooch.ai/predict?api_key=dd329728-54l0-45fc-82ad-b4ed037adxfd'
response = requests.put(api_url, data=json.dumps(payload))
json_data = json.loads(response.content)

print(json_data)
														const axios = require("axios");
const fs = require("fs");
const image_str = fs.readFileSync("your_local_image", { encoding: "base64" });

const payload_json = JSON.stringify({ base64str: image_str, model_id: '027765184-5b08-410c-97c7-c2caf3p01ad', conf_thresh: 0.4, nms_thresh: 0.45 });

axios({ method: "PUT", url: "https://apiv2.chooch.ai/predict?api_key=dd329728-54l0-45fc-82ad-b4ed037adxfd", data: payload_json, headers: { "Content-Type": "application/json" } })
.then(function(response) { console.log(response.data); })
.catch(function(error) { console.log(error.message); });
														base64_string = $(base64 "your_local_image")

curl -d '{"base64str": $base64_string, "model_id": "027765184-5b08-410c-97c7-c2caf3p01ad", "conf_thresh": 0.4, "nms_thresh": 0.45}' -H "Content-Type: application/json" -X PUT https://apiv2.chooch.ai/predict?api_key=dd329728-54l0-45fc-82ad-b4ed037adxfd
The response fields are:
model_id: The UID of the model. In this example it is 027765184-5b08-410c-97c7-c2caf3p01ad.
api_key: API key provided by Chooch. In this example, the API key is dd329728-54l0-45fc-82ad-b4ed037adxfd.
conf_thresh: Threshold for minimum confidence the model has on a detected object(box confidence score).
nms_thresh: Non-Maximum Suppression (NMS) threshold to select the best bounding box for an object and reject or “suppress” all other bounding boxes.“
Expected Results
The returned response will include a list of predictions in JSON format for easy consumption. Each prediction includes a class_title, score confidence in the detection, model_id, and coordinates of where the object is in the image.
{'predictions': [{'class_title': person', 'score': 0.973, 'model_id': 027765184-5b08-410c-97c7-c2caf3p01ad', 'model_title': 027765184-5b08-410c-97c7-c2caf3p01ad', 'coordinates': {'xmin': 248, 'ymin': 410, 'xmax': 1095, 'ymax': 901}}, {'class_title': 'car', 'score': 0.914, 'model_id': ' 027765184-5b08-410c-97c7-c2caf3p01ad, 'model_title': 027765184-5b08-410c-97c7-c2caf3p01ad', 'coordinates': {'xmin': 779, 'ymin': 863, 'xmax': 1257, 'ymax': 1122}}], 'model_type': 'yolov5m', 'status': 1, 'status_description': 'Successful Prediction'}
Chooch API v1
General Image Recognition API
The Chooch API is organized around REST. The API recognizes objects and concepts in videos and images from our pre-trained models. The API is compatible with livestreams and live tagging.
The image recognition API is a straightforward REST API conducting classification and object detection predictions on images. The image URL is passed as a field to the API and the API returns a JSON based response with relevant predictions.
Local Image Post
- Python
- jQuery
- PHP
- cURL
														# Image Recognition with Local Image

import requests

import json

url = 'https://api.chooch.ai/predict/image?apikey=346g5717-1sd3-35h6-9104-b8h5c819dn19'

files = {'image': open('local_image.jpg', 'rb')}

response = requests.post(url, files=files)

print(response.content)
														var form = new FormData();

form.append("image", "");

var settings = {

"url": "https://api.chooch.ai/predict/image?apikey=346g5717-1sd3-35h6-9104-b8h5c819dn19",

"method": "POST",

"timeout": 0,

"processData": false,

"mimeType": "multipart/form-data",

"contentType": false,

"data": form

};

$.ajax(settings).done(function (response) {

console.log(response);

});
														<?php

$curl = curl_init();

curl_setopt_array($curl, array(

CURLOPT_URL => "https://api.chooch.ai/predict/image?apikey=346g5717-1sd3-35h6-9104-b8h5c819dn19",

CURLOPT_RETURNTRANSFER => true,

CURLOPT_ENCODING => "",

CURLOPT_MAXREDIRS => 10,

CURLOPT_TIMEOUT => 0,

CURLOPT_FOLLOWLOCATION => false,

CURLOPT_HTTP_VERSION => CURL_HTTP_VERSION_1_1,

CURLOPT_CUSTOMREQUEST => "POST",

CURLOPT_POSTFIELDS => array('image'=> new CURLFILE('')),

));

$response = curl_exec($curl);

$err = curl_error($curl);

curl_close($curl);

if ($err) {

echo "cURL Error #:" . $err;

} else {

echo $response;

} ?>
curl --location --request POST "https://api.chooch.ai/predict/image?apikey=346g5717-1sd3-35h6-9104-b8h5c819dn19" --form "image=@local_image.jpg"
URL Post
- Python
- jQuery
- PHP
- cURL
														# Image Recognition with Image Url

import requests

import json

url = 'https://api.chooch.ai/predict/image?url=https://s3.amazonaws.com/choochdashboard/base_site/ronaldo_suit.jpg&apikey=346g5717-1sd3-35h6-9104-b8h5c819dn19'

response = requests.post(url)

print(response.content)
														var form = new FormData();

var settings = {

"url": "https://api.chooch.ai/predict/image?url=https://s3.amazonaws.com/choochdashboard/base_site/ronaldo_suit.jpg&apikey=346g5717-1sd3-35h6-9104-b8h5c819dn19",

"method": "GET",

"timeout": 0,

"headers": {

"Content-Type": "application/json"

},

"processData": false,

"mimeType": "multipart/form-data",

"contentType": false,

"data": form

};

$.ajax(settings).done(function (response) {

console.log(response);

});
														<?php

$curl = curl_init();

curl_setopt_array($curl, array(

CURLOPT_URL => "https://api.chooch.ai/predict/image?url=https://s3.amazonaws.com/choochdashboard/base_site/ronaldo_suit.jpg&apikey=346g5717-1sd3-35h6-9104-b8h5c819dn19",

CURLOPT_RETURNTRANSFER => true,

CURLOPT_ENCODING => "",

CURLOPT_MAXREDIRS => 10,

CURLOPT_TIMEOUT => 0,

CURLOPT_FOLLOWLOCATION => false,

CURLOPT_HTTP_VERSION => CURL_HTTP_VERSION_1_1,

CURLOPT_CUSTOMREQUEST => "GET",

CURLOPT_HTTPHEADER => array(

"Content-Type: application/json"

),

));

$response = curl_exec($curl);

$err = curl_error($curl);

curl_close($curl);

if ($err) {

echo "cURL Error #:" . $err;

} else {

echo $response;

} ?>
curl --location --request GET "https://api.chooch.ai/predict/image?url=https://s3.amazonaws.com/choochdashboard/base_site/ronaldo_suit.jpg&apikey=346g5717-1sd3-35h6-9104-b8h5c819dn19" --header "Content-Type: application/json"
API input fields are:
url: URL of the image file. In this example it is https://s3.amazonaws.com/choochdashboard/base_site/ronaldo_suit.jpg
api_key: API key provided by Chooch. In this example it is 346g5717-1sd3-35h6-9104-b8h5c819dn19.
You can retrieve your API key by logging in to your AI Vision Studio account.
Sample Output (Image)
The sample JSON response is:
														{
  "status": "ok",
  "url": "https://s3.amazonaws.com/choochdashboard/base_site/ronaldo_suit.jpg",
  "predictions": [
    {
      "class_title": "Cristiano Ronaldo",
      "order": "1"
    },
    {
      "class_title": "tom ford style",
      "order": "2"
    },
    {
      "class_title": "double-breasted suit, fashion",
      "order": "3"
    },
    {
      "class_title": "man",
      "order": "6"
    },
    {
      "class_title": "suit",
      "order": "7"
    },
    {
      "class_title": "cartoon, sterling archer",
      "order": "8"
    },
    {
      "class_title": "icon",
      "order": "9"
    },
    {
      "class_title": "man's clothing",
      "order": "10"
    },
    {
      "class_title": "face",
      "order": "11"
    },
    {
      "class_title": "male",
      "order": "12"
    },
    {
      "class_title": "young man",
      "order": "13"
    },
    {
      "class_title": "actor, doer",
      "order": "14"
    },
    {
      "class_title": "tie",
      "order": "15"
    },
    {
      "class_title": "striped tie",
      "order": "16"
    },
    {
      "class_title": "windsor tie",
      "order": "17"
    },
    {
      "class_title": "four-in-hand tie",
      "order": "18"
    },
    {
      "class_title": "cravat",
      "order": "19"
    }
  ],
  "texts": {
    "status": "limited to 15 results",
    "predictions": [

    ],
    "summary": [

    ]
  },
  "objects": {
    "predictions": [
      {
        "sub_predictions": [
          {
            "class_title": "tom ford style",
            "order": 1
          },
          {
            "class_title": "double breasted suit",
            "order": 2
          },
          {
            "class_title": "brown tie",
            "order": 3
          },
          {
            "class_title": "double-breasted suit, fashion",
            "order": 4
          }
        ],
        "object_title": "man",
        "coordinates": "0,749,64,982"
      },
      {
        "sub_predictions": [
          {
            "class_title": "cartoon, sterling archer",
            "order": 1
          },
          {
            "class_title": "tom ford style",
            "order": 2
          },
          {
            "class_title": "sterling archer",
            "order": 3
          },
          {
            "class_title": "double breasted suit",
            "order": 4
          },
          {
            "class_title": "brown tie",
            "order": 5
          },
          {
            "class_title": "double-breasted suit, fashion",
            "order": 6
          },
          {
            "class_title": "icon",
            "order": 7
          },
          {
            "class_title": "man's clothing",
            "order": 8
          }
        ],
        "object_title": "suit",
        "coordinates": "25,712,305,995"
      },
      {
        "sub_predictions": [
          {
            "class_title": "male",
            "order": 1
          },
          {
            "class_title": "young man",
            "order": 2
          },
          {
            "class_title": "actor, doer",
            "order": 3
          }
        ],
        "object_title": "face",
        "coordinates": "225,504,75,464"
      },
      {
        "sub_predictions": [
          {
            "class_title": "striped tie",
            "order": 1
          },
          {
            "class_title": "windsor tie",
            "order": 2
          },
          {
            "class_title": "four-in-hand tie",
            "order": 3
          },
          {
            "class_title": "cravat",
            "order": 4
          }
        ],
        "object_title": "tie",
        "coordinates": "320,436,523,875"
      }
    ],
    "summary": [
      {
        "count": "1",
        "object_title": "tie"
      },
      {
        "count": "1",
        "object_title": "face"
      },
      {
        "count": "1",
        "object_title": "suit"
      },
      {
        "count": "1",
        "object_title": "man"
      }
    ]
  },
  "faces": {
    "face_count": 1,
    "predictions": [
      {
        "face_name": "Cristiano Ronaldo",
        "coordinates": "248,506,192,450"
      }
    ]
  },
  "predicttype": "dense",
  "fileid": "c2f02758f0dd4b8ab703e26f4d70d7c7"
}
Response fields are:
url: URL of the image file posted
status: Status of the API request. When successful the status is “ok”. For error messages see last section.
predictions: Predictions made on the image. Predictions are provided as a pst and have class_title and order fields.class_title is the name of the class predicted, and order is the order of relevancy of the particular class.
sub_predictions: Predictions made under dense classification. The image or frame is segmented into parts and classified based on the segments.
text_value: Text predictions
face_name: Facial recognition name predictions
face_count: Sum of faces.
coordinates: Coordinates of the object based on pixels. The format for the coordinates is X1, X2, Y1, Y2.
count: The number of times an object or concept appears in an image or a frame.
fileid: Unique File ID created for the image. The File ID is to identify the image for future references. In this example it is ec7995bb557d4416ab97b819917fc18c.
General Status Messages
ok
Error (Wrong Parameters)
Error (Invapd API Key)
Error (You Have Reached Your Trial API Call limit)
Error (No File)
FTP Drop Function
The FTP drop function was developed on top of the Chooch API for image and video professionals who want to tag their images and videos autonomously. For every cpent a personal FTP host is issued together with the API.
FTP Host: ftp://52.207.237.100
API Key: 6werc42-1675-6553-8105
The FTP drop sends the image to the API. The API predicts the image and places the results in the keywords field of the IPTC metadata file. Once the metadata has been successfully placed into the keywords fields of the IPTC file, it is sent to the destination directed by the user.
Custom Face Recognition API
Chooch Face Recognition consists of Perception > People > Images
You can search and tag a face in the Chooch API by feeding it an image of a face. Below is a sample post of an image url.
Sample Output (Image)
The fields are:
url: This is the image url of the face to be searched.In this example it is https://choochdashboard.s3.amazonaws.com/base_site/1461123713-esq050116cover001s.jpg.
person_id_filter: This field is a filter that is optional to pass. The default -1 which means don’t filter by person. If a valid person_id is passed, Chooch will search only in that given person’s data. In this example it is -1.
>model_id: This is the id of the perception that the search will be made on. This field is required. In this example it is 14.
URL Post
You can also post an image through the image field. Below are 2 separate sample posts in python.
- Python
- jQuery
- PHP
- cURL
														import requests

import json

import time

url = 'https://api.chooch.ai/predict/face?url=https://choochdashboard.s3.amazonaws.com/base_site/1461123713-esq050116cover001s.jpg&person_id_filter=-1&model_id=14&apikey=346g5717-1sd3-35h6-9104-b8h5c819dn19'

response = requests.post(url)

json_data = json.loads(response.content)

print(json_data)
														var form = new FormData();

var settings = {

"url": "https://api.chooch.ai/predict/face?url=https://choochdashboard.s3.amazonaws.com/base_site/1461123713-esq050116cover001s.jpg&person_id_filter=-1&model_id=14&apikey=346g5717-1sd3-35h6-9104-b8h5c819dn19",

"method": "POST",

"mimeType": "multipart/form-data",

"contentType": false,

"data": form

};

$.ajax(settings).done(function (response) {

console.log(response);

});
														<?php

$curl = curl_init();

curl_setopt_array($curl, array(

CURLOPT_URL => "https://api.chooch.ai/predict/face?url=https://choochdashboard.s3.amazonaws.com/base_site/1461123713-esq050116cover001s.jpg&person_id_filter=-1&model_id=14&apikey=346g5717-1sd3-35h6-9104-b8h5c819dn19",

CURLOPT_RETURNTRANSFER => true,

CURLOPT_ENCODING => "",

CURLOPT_MAXREDIRS => 10,

CURLOPT_TIMEOUT => 0,

CURLOPT_FOLLOWLOCATION => false,

CURLOPT_HTTP_VERSION => CURL_HTTP_VERSION_1_1,

CURLOPT_CUSTOMREQUEST => "POST",

));

$response = curl_exec($curl);

$err = curl_error($curl);

curl_close($curl);

if ($err) {

echo "cURL Error #:" . $err;

} else {

echo $response;

} ?>
curl --location --request POST "https://api.chooch.ai/predict/face?url=https://choochdashboard.s3.amazonaws.com/base_site/1461123713-esq050116cover001s.jpg&person_id_filter=-1&model_id=14&apikey=346g5717-1sd3-35h6-9104-b8h5c819dn19"
Local Image Post
- Python
- jQuery
- PHP
- cURL
- Java
- C#
														import requests

import json

import time

url = 'https://api.chooch.ai/predict/face?person_id_filter=-1&model_id=5&apikey=346g5717-1sd3-35h6-9104-b8h5c819dn19'

files = {'image': open('local_image.jpg', 'rb')}

response = requests.post(url, files=files)

json_data = json.loads(response.content)

print(json_data)
														var form = new FormData();

form.append("image", "");

var settings = {

"url": "https://api.chooch.ai/predict/face?person_id_filter=-1&model_id=14&apikey=346g5717-1sd3-35h6-9104-b8h5c819dn19",

"method": "POST",

"timeout": 0,

"processData": false,

"mimeType": "multipart/form-data",

"contentType": false,

"data": form

};

$.ajax(settings).done(function (response) {

console.log(response);

});
														<?php

$curl = curl_init();

curl_setopt_array($curl, array(

CURLOPT_URL => "https://api.chooch.ai/predict/face?person_id_filter=-1&model_id=14&apikey=346g5717-1sd3-35h6-9104-b8h5c819dn19",

CURLOPT_RETURNTRANSFER => true,

CURLOPT_ENCODING => "",

CURLOPT_MAXREDIRS => 10,

CURLOPT_TIMEOUT => 0,

CURLOPT_FOLLOWLOCATION => false,

CURLOPT_HTTP_VERSION => CURL_HTTP_VERSION_1_1,

CURLOPT_CUSTOMREQUEST => "POST",

CURLOPT_POSTFIELDS => array('image'=> new CURLFILE('')),

));

$response = curl_exec($curl);

$err = curl_error($curl);

curl_close($curl);

if ($err) {

echo "cURL Error #:" . $err;

} else {

echo $response;

} ?>
curl --location --request POST "https://api.chooch.ai/predict/face?person_id_filter=-1&model_id=14&apikey=346g5717-1sd3-35h6-9104-b8h5c819dn19" --form "image=@local_image.jpg"
														import java.io.File;

import kong.unirest.HttpResponse;

import kong.unirest.JsonNode;

import kong.unirest.Unirest;


public class Test {

public static void main(String[] args) {

    HttpResponse<JsonNode> response = Unirest.post("https://api.chooch.ai/predict/face?person_id_filter=-1&model_id=5&apikey=346g5717-1sd3-35h6-9104-b8h5c819dn19").field("image", new File("/home/ashwmadhu/Desktop/12.jpg")).asJson();

    System.out.println(response.getBody());

    }

}
														using System;
using RestSharp;

namespace TestProject
{
    class Program
    {
        static void Main(string[] args)
        {
            var client = new RestClient("https://api.chooch.ai/predict/face?person_id_filter=-1&model_id=5&apikey=346g5717-1sd3-35h6-9104-b8h5c819dn19");
            var request = new RestRequest(Method.POST); var path = "/home/ashwmadhu/Desktop/12.jpg";
            request.AddFile("image", path);
            IRestResponse response = client.Execute(request);
            Console.WriteLine(response.Content);
        }
    }
}
JSON Response
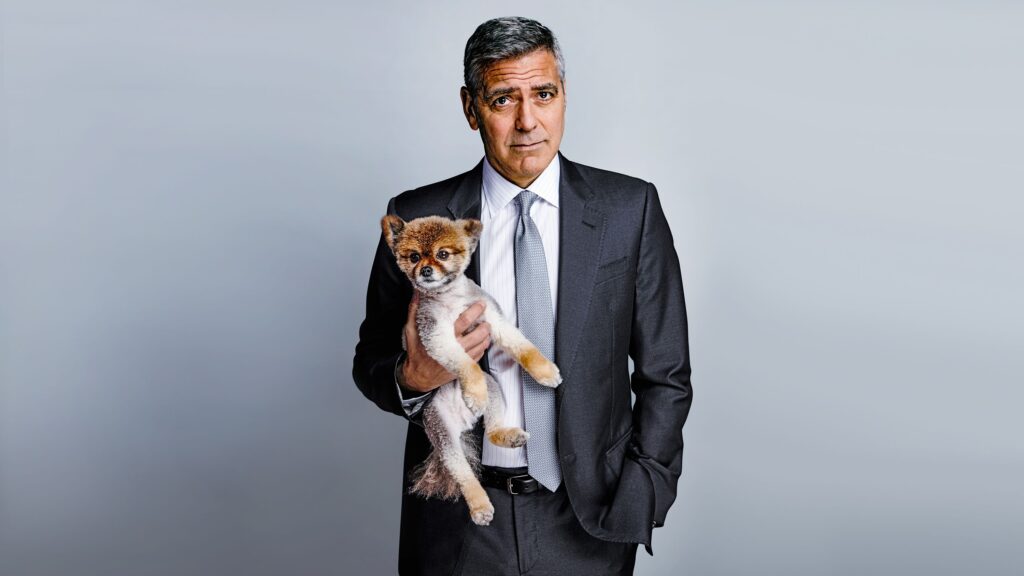
The example JSON response is here below. In this example, the similarity is 0.80. The face_recog_hit is True when there is a match and False when there is no match.
														{
    status: "ok",
    person_id_filter: -1,
    faces_detected: [
        {
            person_name: "George Clooney",
            similarity: 0.8,
            coordinates: "1402,1657,158,506",
            image_url: "https://choochdashboard.s3.amazonaws.com/media/face_models/14/George_Clooney/george-clooney-actor-2016.jpg",
            person_id: 22,
            key_id: null
        }
    ],
    face_recog_hit: true,
    face_count: 1,
    post_type: "face_search",
    faces: [
        {
            person_name: "George Clooney",
            similarity: 0.8,
            face_live: null,
            coordinates: "1402,1657,158,506",
            person_id: 22,
            key_id: null,
            face_live_status_description: null
        }
    ],
    similar_faces: [
        {
            person_name: "George Clooney",
            similarity: 0.8,
            coordinates: "1402,1657,158,506",
            image_url: "https://s3.amazonaws.com/choochdashboard/media/face_models/14/George_Clooney/220px-George_Clooney_2016_(1).jpg",
            person_id: 22,
            key_id: null,
            order: 1
        },
        {
            person_name: "4566",
            similarity: 0.8,
            coordinates: "1402,1657,158,506",
            image_url: "https://s3.amazonaws.com/choochdashboard/media/face_models/api/-1/79db335f-46e8-4e35-b15e-5174a5bc7d22.jpg",
            person_id: 131,
            key_id: "4566",
            order: 2
        },
        {
            person_name: "5677",
            similarity: 0.08,
            coordinates: "1402,1657,158,506",
            image_url: "https://s3.amazonaws.com/choochdashboard/media/face_models/api/None/9f7eff07-6313-461b-b326-1a1949138244.jpg",
            person_id: 130,
            key_id: "5677",
            order: 3
        },
        {
            person_name: "Hakan Gultekin",
            similarity: 0.07,
            coordinates: "1402,1657,158,506",
            image_url: "https://s3.amazonaws.com/choochdashboard/media/face_models/14/Hakan_Gultekin/37592577_10155843376073845_3443616404685717504_n.jpg",
            person_id: 117,
            key_id: null,
            order: 4
        }
    ]
}
This API function allows the user to add a face image with a unique id. It can be a unique person name, or a unique id assigned to a person.
- Python
- jQuery
- PHP
- cURL
- Java
- C#
														import requests

import json

import time

url = 'https://api.chooch.ai/predict/face?&key_id=3245&model_id=7&command=insert_person_image_key_id&apikey=46g5717-1sd3-35h6-9104-b8h5c819dn19'

files = {'image': open('/home/ashwmadhu/Desktop/12.jpg', 'rb')}

response = requests.post(url, files=files)

json_data = json.loads(response.content)

print(json_data)
														var form = new FormData();

form.append("image", "");

var settings = {

"url": "https://api.chooch.ai/predict/face?&key_id=3245&model_id=7&command=insert_person_image_key_id&apikey=46g5717-1sd3-35h6-9104-b8h5c819dn19",

"method": "POST",

"timeout": 0,

"processData": false,

"mimeType": "multipart/form-data",

"contentType": false,

"data": form

};

$.ajax(settings).done(function (response) {

console.log(response);

});
														<?php

$curl = curl_init();

curl_setopt_array($curl, array(

CURLOPT_URL => "https://api.chooch.ai/predict/face?&key_id=3245&model_id=7&command=insert_person_image_key_id&apikey=46g5717-1sd3-35h6-9104-b8h5c819dn19",

CURLOPT_RETURNTRANSFER => true,

CURLOPT_ENCODING => "",

CURLOPT_MAXREDIRS => 10,

CURLOPT_TIMEOUT => 0,

CURLOPT_FOLLOWLOCATION => false,

CURLOPT_HTTP_VERSION => CURL_HTTP_VERSION_1_1,

CURLOPT_CUSTOMREQUEST => "POST",

CURLOPT_POSTFIELDS => array('image'=> new CURLFILE('')),

));

$response = curl_exec($curl);

$err = curl_error($curl);

curl_close($curl);

if ($err) {

echo "cURL Error #:" . $err;

} else {

echo $response;

} ?>
curl -X POST 'https://api.chooch.ai/predict/face?key_id=3245&model_id=7&command=insert_person_image_key_id&apikey=46g5717-1sd3-35h6-9104-b8h5c819dn19' -F image=@/home/ashwmadhu/Desktop/12.jpg
														import java.io.File;

import kong.unirest.HttpResponse;

import kong.unirest.JsonNode;

import kong.unirest.Unirest;

public class Test {
public static void main(String[] args) {
    HttpResponse<JsonNode> response = Unirest.post("https://api.chooch.ai/predict/face?&key_id=3245&model_id=7&command=insert_person_image_key_id&apikey=46g5717-1sd3-35h6-9104-b8h5c819dn19").field("image", new File("/home/ashwmadhu/Desktop/12.jpg")).asJson();
    System.out.println(response.getBody());
    }
}
														using System;
using RestSharp;

namespace TestProject
{
    class Program
    {
        static void Main(string[] args)
        {
        var client = new RestClient("https://api.chooch.ai/predict/face?&key_id=3245&model_id=7&command=insert_person_image_key_id&apikey=46g5717-1sd3-35h6-9104-b8h5c819dn19");
        var request = new RestRequest(Method.POST);
        var path = "/home/ashwmadhu/Desktop/12.jpg";
request.AddFile("image", path);
        IRestResponse response = client.Execute(request);
        Console.WriteLine(response.Content);
        }
    }
}
JSON Response
														{
  "status_description":"success",
  "post_type":"insert_person_image",
  "status":41868
}
Create Person API Command
You can create a person through the Chooch API. Below is a sample Python based usage of the create_person command.
- Python
- jQuery
- PHP
- cURL
- Java
- C#
														# Create Person Python Code
import requests

import json

url = 'https://api.chooch.ai/predict/face?person_name=Tom Bill&model_id=5&apikey=cx065e5d-51wc87-9df6-163e-8b65a78k51e3&command=create_person'

response = requests.post(url)

json_data = json.loads(response.content)

print(json_data)
														var form = new FormData();

var settings = {

"url": "https://api.chooch.ai/predict/face?person_name=Tom Bill&model_id=5&apikey=cx065e5d-51wc87-9df6-163e-8b65a78k51e3&command=create_person",

"method": "POST",

"processData": false,

"mimeType": "multipart/form-data",

"contentType": false,

"data": form

};

$.ajax(settings).done(function (response) {

console.log(response);

});
														<?php

$curl = curl_init();

curl_setopt_array($curl, array(

CURLOPT_URL => "https://api.chooch.ai/predict/face?person_name=Tom%20Bill&model_id=5&apikey=cx065e5d-51wc87-9df6-163e-8b65a78k51e3&command=create_person",

CURLOPT_RETURNTRANSFER => true,

CURLOPT_ENCODING => "",

CURLOPT_MAXREDIRS => 10,

CURLOPT_TIMEOUT => 0,

CURLOPT_FOLLOWLOCATION => false,

CURLOPT_HTTP_VERSION => CURL_HTTP_VERSION_1_1,

CURLOPT_CUSTOMREQUEST => "POST",

));

$response = curl_exec($curl);

$err = curl_error($curl);

curl_close($curl);

if ($err) {

echo "cURL Error #:" . $err;

} else {

echo $response;

} ?>
curl --location --request POST "https://api.chooch.ai/predict/face?person_name=Tom%20Bill&model_id=5&apikey=cx065e5d-51wc87-9df6-163e-8b65a78k51e3&command=create_person"
														import java.io.File;
import kong.unirest.HttpResponse;
import kong.unirest.JsonNode;
import kong.unirest.Unirest;

public class Test {
public static void main(String[] args) {
    HttpResponse<JsonNode> response = Unirest.post("https://api.chooch.ai/predict/face?person_name=Tom&model_id=5&apikey=cx065e5d-51wc87-9df6-163e-8b65a78k51e3&command=create_person").asJson();
    System.out.println(response.getBody());
    }
}
														using System;
using RestSharp;

namespace TestProject
{
    class Program
    {
        static void Main(string[] args)
        {
        var client = new RestClient("https://api.chooch.ai/predict/face?person_name=Tom%20Bill&model_id=5&apikey=cx065e5d-51wc87-9df6-163e-8b65a78k51e3&command=create_person");
        var request = new RestRequest(Method.POST);
        IRestResponse response = client.Execute(request);
        Console.WriteLine(response.Content);
        }
    }
}
JSON Response
														{
    person_id: 37,
    status: 37,
    status_description: success,
    post_type: create_person
}
Return Status Values
status > 0 : success, and the return value is the person_id.
status = 0 : error has occurred.
status = -1 : invalid model id.
status = -2 : invalid person name.
p
Insert Person Image API Command
A face image can be added to an existing person using the person_id. Below is a sample Python based usage of the insert_person_image command.
- Python
- jQuery
- PHP
- cURL
														# Add face image to person with person_id_filter (person_id) Python Code

import requests

import json

url = 'https://api.chooch.ai/predict/face?person_id_filter=37&apikey=cx065e5d-51wc87-9df6-163e-8b65a78k51e3&command=insert_person_image'

files = {'image': open('your_image.jpg', 'rb')}

response = requests.post(url, files=files)

json_data = json.loads(response.content)

print(json_data)
														var form = new FormData();

form.append("image", "");

var settings = {

"url": "https://api.chooch.ai/predict/face?person_id_filter=37&apikey=cx065e5d-51wc87-9df6-163e-8b65a78k51e3&command=insert_person_image",

"method": "POST",

"processData": false,

"mimeType": "multipart/form-data",

"contentType": false,

"data": form

};

$.ajax(settings).done(function (response) {

console.log(response);

});
														<?php

$curl = curl_init();

curl_setopt_array($curl, array(

CURLOPT_URL => "https://api.chooch.ai/predict/face?person_id_filter=37&apikey=cx065e5d-51wc87-9df6-163e-8b65a78k51e3&command=insert_person_image",

CURLOPT_RETURNTRANSFER => true,

CURLOPT_ENCODING => "",

CURLOPT_MAXREDIRS => 10,

CURLOPT_TIMEOUT => 0,

CURLOPT_FOLLOWLOCATION => false,

CURLOPT_HTTP_VERSION => CURL_HTTP_VERSION_1_1,

CURLOPT_CUSTOMREQUEST => "POST",

URLOPT_POSTFIELDS => array('image'=> new CURLFILE('')),

));

$response = curl_exec($curl);

$err = curl_error($curl);

curl_close($curl);

if ($err) {

echo "cURL Error #:" . $err;

} else {

echo $response;

} ?>
curl --location --request POST "https://api.chooch.ai/predict/face?person_id_filter=37&apikey=cx065e5d-51wc87-9df6-163e-8b65a78k51e3&command=insert_person_image" --form "image=@"
JSON Response
														{
    status: 210,
    status_description: success,
    post_type: insert_person_image
}
Return Status Values
status > 0 : success, and the return value is the image id.
status = 0 : error has occurred.
status = -1 : no face detected.
status = -2 : invalid person id.
Support
For questions or technical support, please contact [email protected].